Looking for popular Swedish weaving patterns? Read our guide to get the fundamentals you need to get you started…
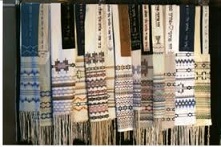
Swedish weaving, also known as “huck embroidery,” is a simple to master technique of weaving embroidery threads through small loops (known as “floats”) that are located on the surface of a specially woven fabric, called “huck fabric.”
Traditional Swedish weaving first achieved popularity in the United States in the 1930’s and 40’s. It is currently experiencing a renewed popularity and interest. Certain aspects of Swedish weaving have evolved over time. Originally the needlework utilized embroidery floss or thread to embellish plain white linens like towels, table runners and pillow cases.
The practical applications of Swedish weaving now encompass afghans, pillows, placemats, rugs, table cloths, wall hangings and more, yet the basic methods and techniques remain essentially the same.
Huck toweling designs are often woven on Monk’s cloth, Stockholm fabric, Aida and an assortment of even weave fabrics.
The web is populated with hundreds of patterns and suggestions that relate to Swedish weaving. Choices of patterns include instruction for afghans and other creations, Basic materials that one might need to procure before embarking on a Swede weaving session include the following:
• Monk’s cloth
• 4-ply yarn
• a #13 yarn needle
• a pair of scissors
• a pattern
If you are the type of person that learns best by watching another person perform a particular task the web may come to your rescue in another way as well. Look for links to web sites like Youtube that offer visual demonstrations of Swedish weaving designed to bring the beginner up to speed in no time at all.
Once mastered this easy-to-learn technique opens the door to an endless variety of patterns and color combinations.
The following hints are intended to let you get the hang of huck embroidery:
Huck toweling (or huck fabric) has vertical loops on one side and horizontal loops on the other. Most directions (such as those below) should clearly indicate the “correct” side the design is to be worked.
When you are beginning to weave, leave 3 inches of thread free. Once the weaving is completed, weave back through the design for an inch or so, and finish off the 3-inch length in the very same manner.
When beginning a fresh thread in the center of a row, start your weaving an inch ahead of the end of the previous thread.
When an article is finished, place the embroidery face down on a soft towel and press firmly on the wrong (obverse) side of the completed embroidery.


