

A roof leak rarely starts as a dramatic waterfall. Most of the time it begins with small, easy-to-miss clues: a faint ceiling stain, slightly bubbling paint, a damp smell in the attic, or a few shingle granules collecting in the gutters. The problem is that water doesn’t always drip straight down — it can travel along rafters, insulation, and roof decking before it becomes visible inside the room.
This photo guide shows 25 of the most common roof leak warning signs (including storm and hail damage) and explains what each one usually means. Use it as a quick homeowner checklist after heavy rain, wind, snow melt, or whenever something “looks off” on your ceiling or roofline. Catching leaks early can help prevent mold growth, wood rot, insulation damage, and expensive repairs later.
Read more
Quick check order (fastest to slowest):
Start inside, then move outside — this helps you narrow down the source faster.
1) Inside the house (5 minutes)
- Check for ceiling water stains, brown rings, or paint bubbling near exterior walls.
- Look for damp spots around skylights, chimneys, and bathroom ceilings.
- Pay attention to new musty odors, especially after rain.
2) Attic inspection (10 minutes)
- Look for wet insulation, dark wood patches, moisture discoloration, or visible dripping.
- Use a flashlight to check around roof penetrations: vent boots, exhaust vents, and pipe stacks.
- If you see any daylight through the roof deck, that’s an urgent red flag.
3) Outside signs (from the ground, no climbing needed)
- Missing or lifted shingles after wind.
- Rusted or separated flashing near walls and chimneys.
- Overflow streaks and debris buildup in gutters and roof valleys.
- Moss growth on shaded roof areas (traps moisture and accelerates wear).
After storm or hail:
Check for granule loss, bruising, and consistent damage patterns on one side of the roof. Hail impacts can weaken shingles and cause leaks weeks later.
When to call a roofer for repair or inspection:
- Active dripping in the attic
- Sagging drywall or soft ceiling spots
- Widespread wet insulation
- Growing stains after each rain
- Visible gaps around flashing, vents, or roof edges
Safety note:
Avoid walking on a steep, wet, or icy roof. If you’re unsure, take photos from the ground and contact a licensed roofer for a professional inspection.
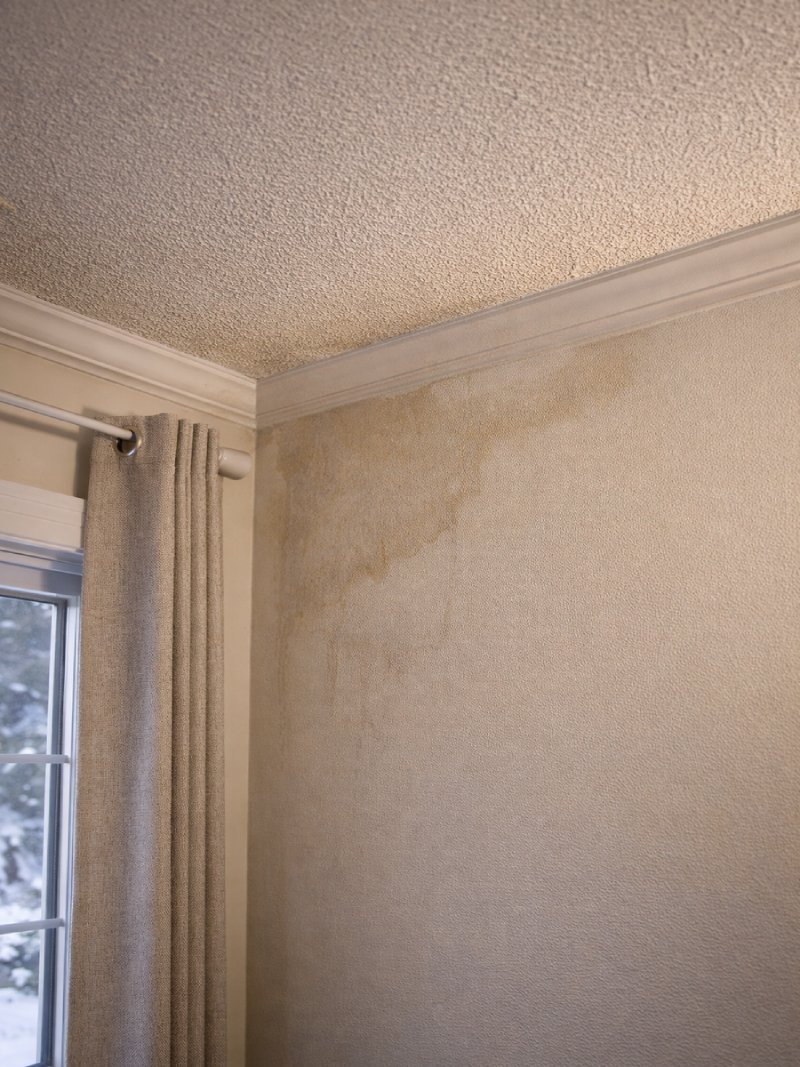
Moment #1: Brown ceiling stain ring
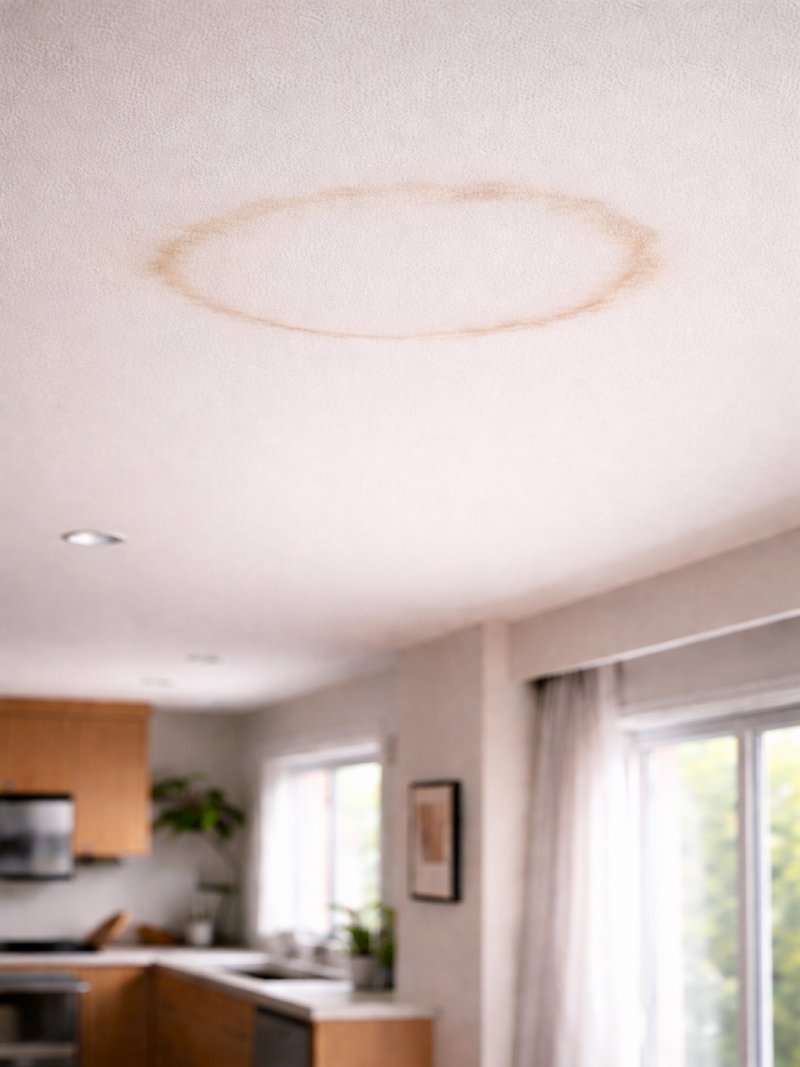
A brown ring stain is one of the earliest warning signs of a roof leak. Even if the spot looks small, water may be traveling along framing before it becomes visible in the room. Watch whether the stain grows after rain or snow melt. If it changes quickly, the source is often above the area near flashing, vents, or a valley line.
Moment #2: Bubbling paint and peeling drywall
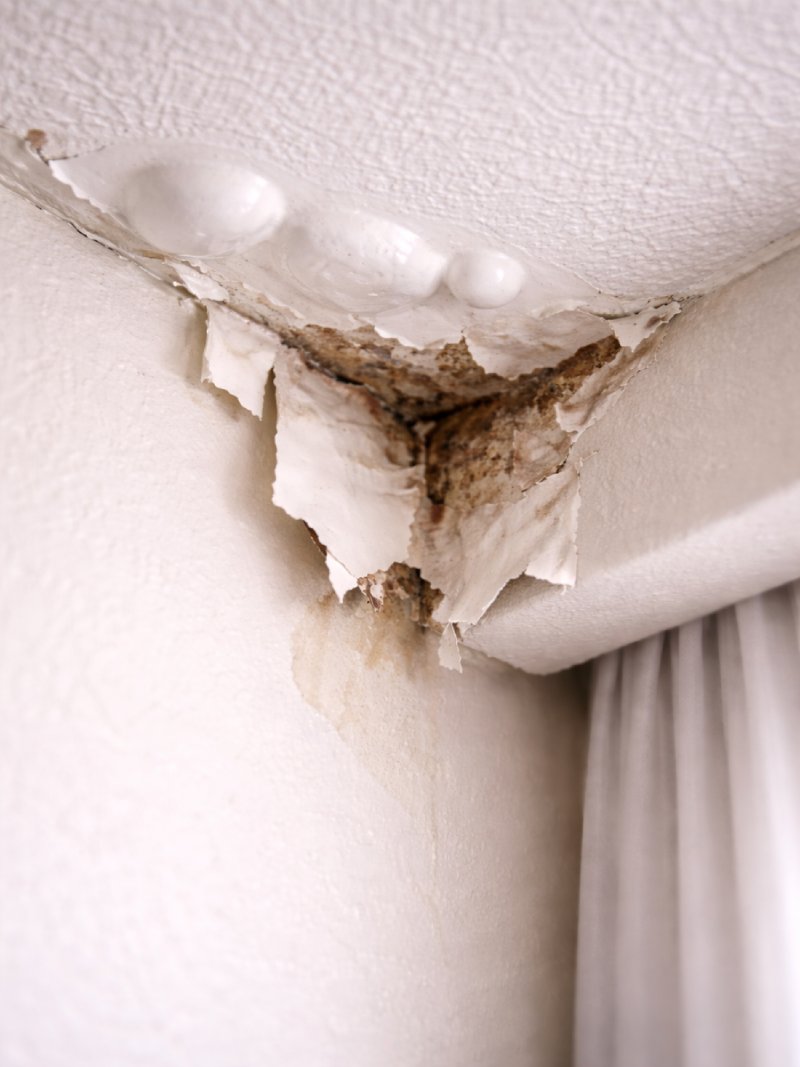
Bubbling paint usually means moisture is trapped behind the surface. Slow leaks around roof flashing or valleys can soak drywall for days or weeks before it looks “serious.” The key sign is texture change: soft spots, blistering, or peeling edges. If you see this after storms, treat it as a repair priority to reduce the risk of mold and larger interior damage.
Moment #3: Damp attic insulation patch
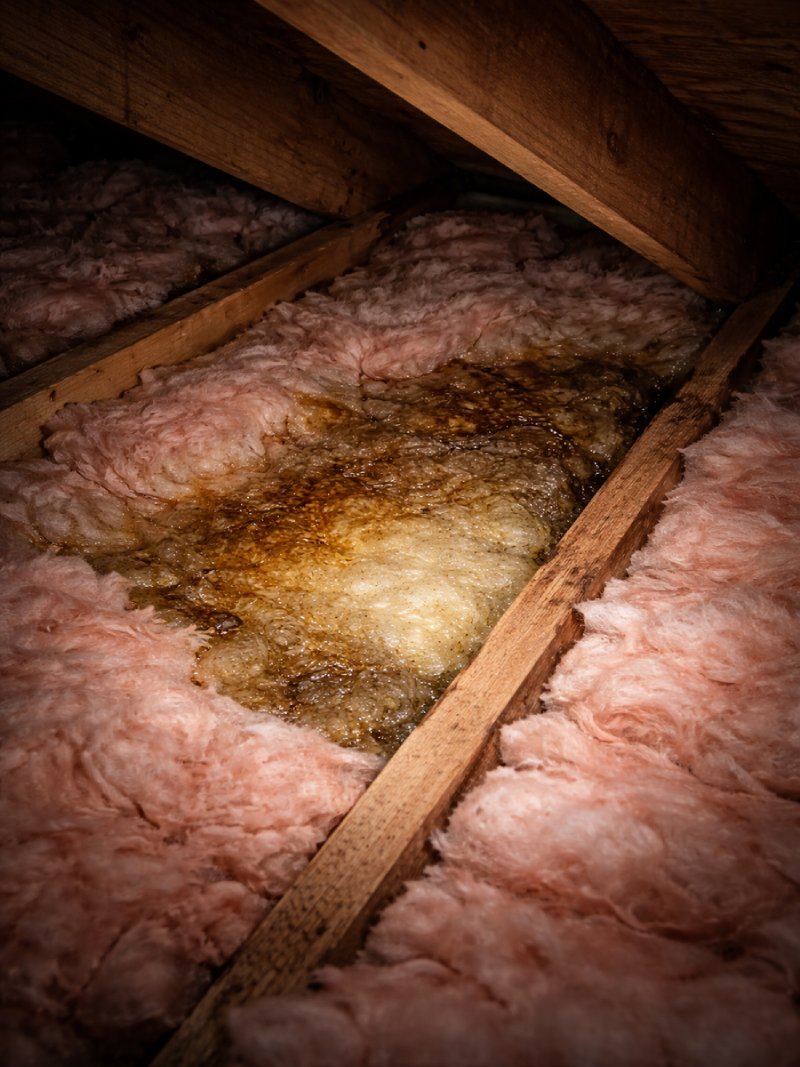
Wet insulation loses most of its thermal performance and keeps moisture in place longer. A damp patch in the attic often points to a roof penetration issue above it—vent boots, nails, underlayment seams, or small decking gaps. Check for moisture patterns directly above the insulation and on nearby wood. Catching this early can prevent staining in living areas and rot in roof framing.
Moment #4: Moisture discoloration on attic decking
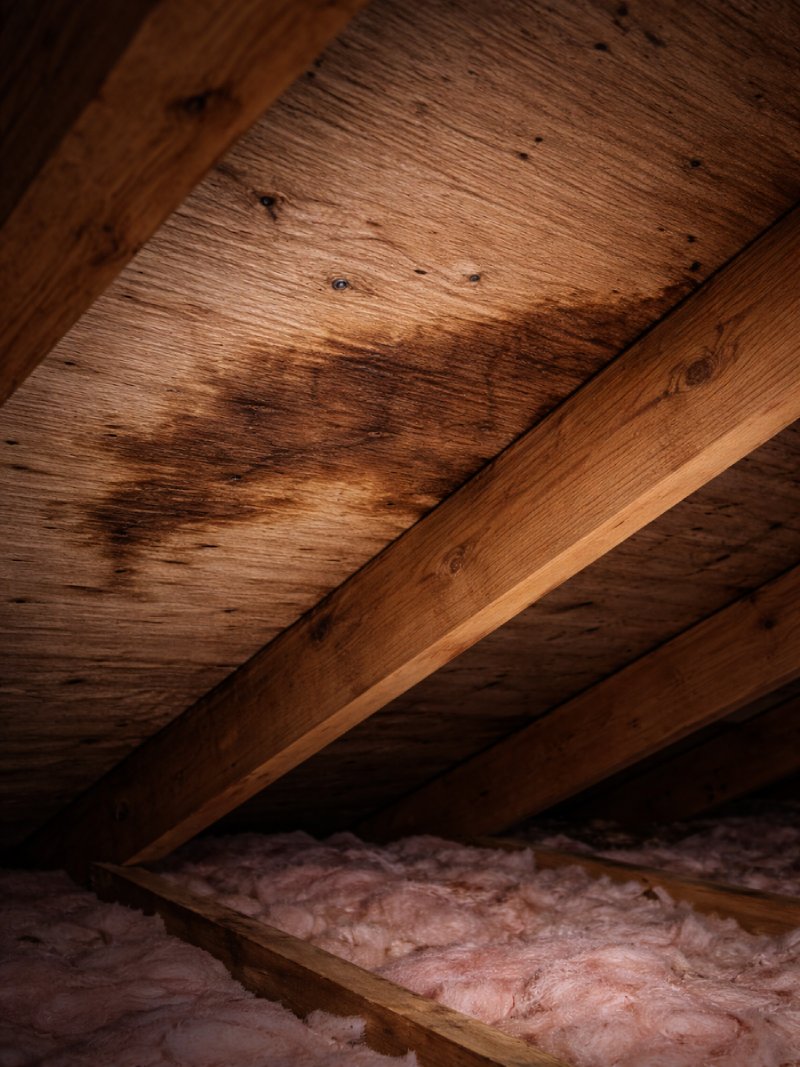
Subtle discoloration on roof decking is a common “quiet leak” sign. It may appear long before you see a ceiling stain, especially if insulation absorbs the first moisture. Look for darkened wood, small water tracks, or a slightly glossy damp surface near seams. Persistent moisture here can lead to mold and structural weakening, so it’s worth documenting and checking again after rain.
Moment #5: Daylight through the roof deck
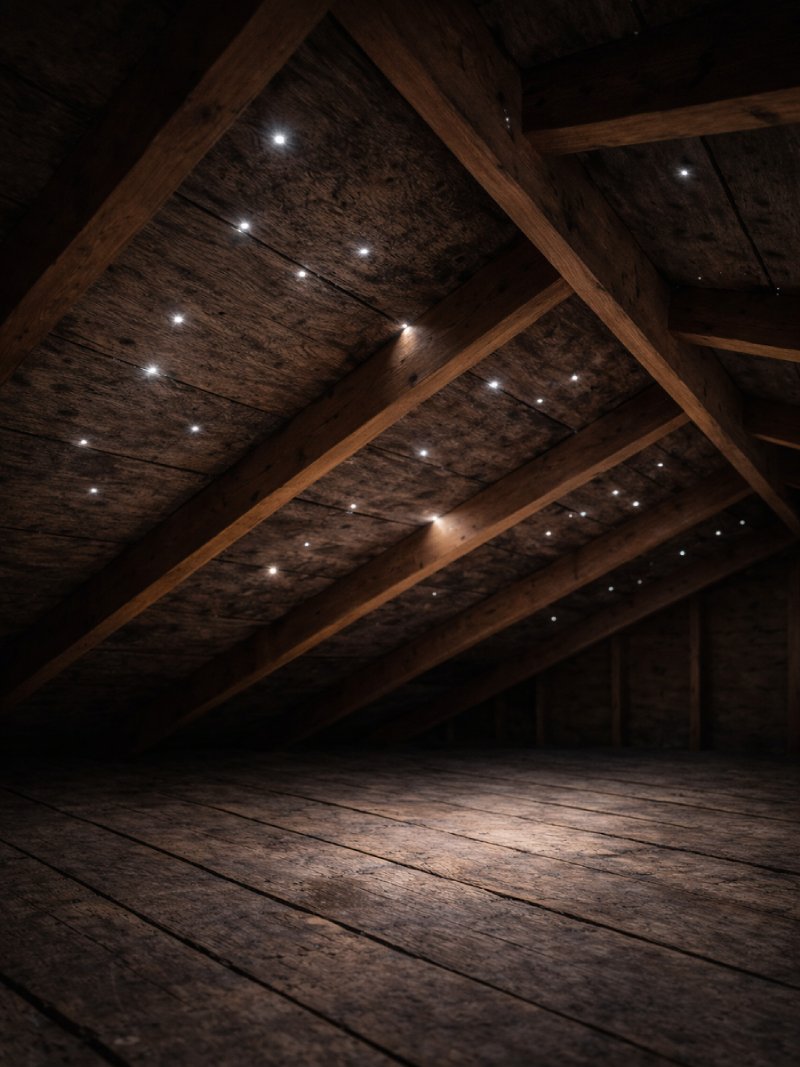
If you can see pinpoints of daylight from inside the attic, water can enter too. Tiny holes can form near fasteners, aging decking, or storm-damaged areas. These gaps often expand with wind and temperature cycles. Even if the leak seems minor now, repeated wetting can damage insulation and wood over time. This is usually a good reason to schedule a focused roof inspection.
Moment #6: Missing or lifted shingles after wind
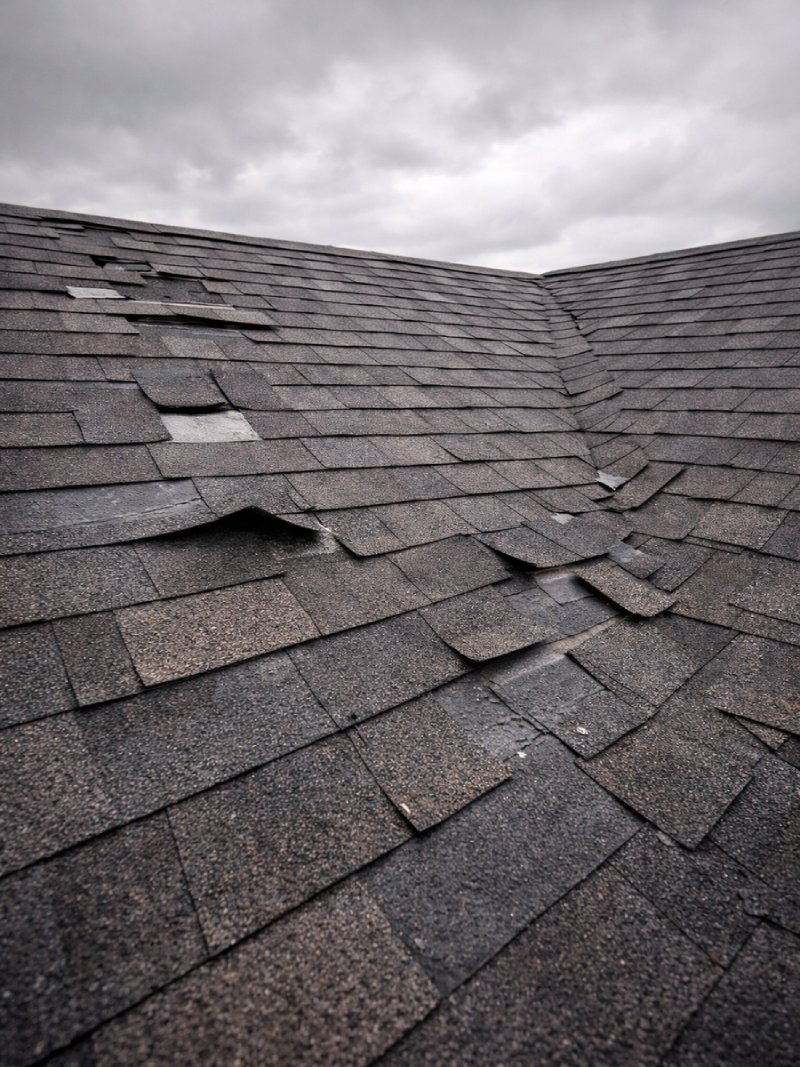
Lifted shingles break the seal strip and allow wind-driven rain to push underneath. After storms, this is one of the most common ways leaks start near edges and valleys. Look for corners that don’t lie flat or missing pieces after strong wind. Water can run under multiple courses of shingles before showing indoors. Quick spot repairs can prevent bigger underlayment and decking damage.
Moment #7: Cracked shingle corners
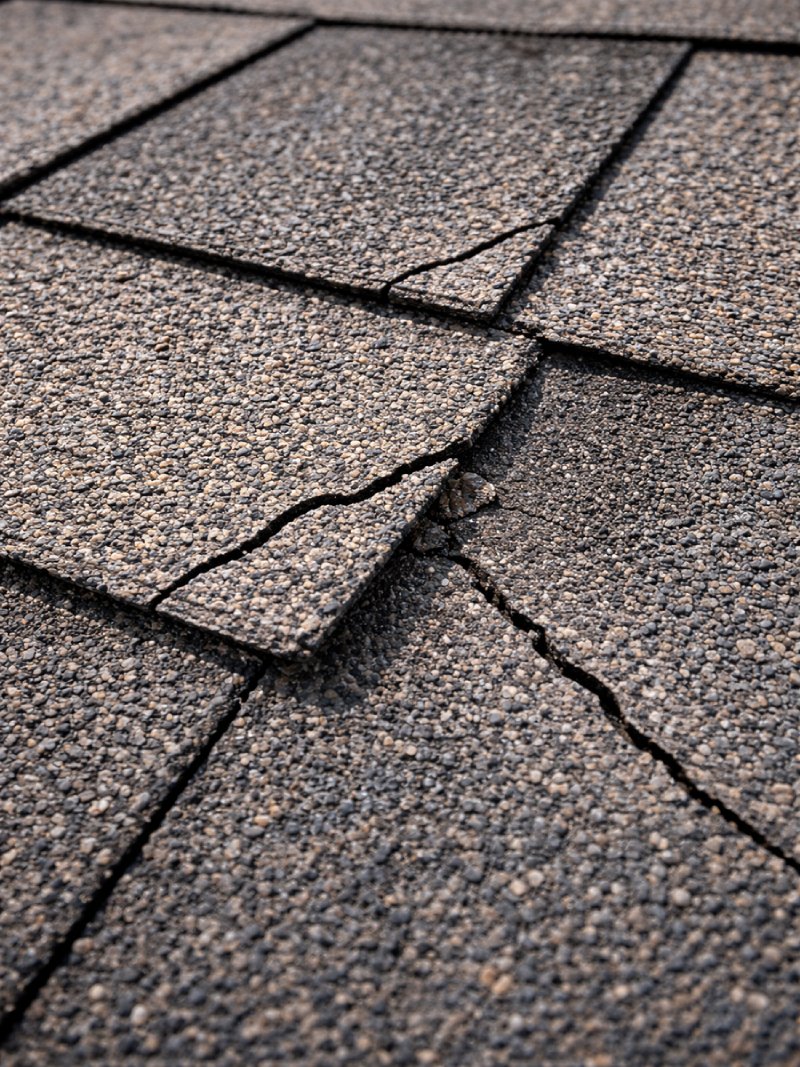
Cracks often start at the corners where shingles flex the most. Once the surface breaks, water can work under the shingle layer and spread sideways. This is a typical sign of aging asphalt shingles or repeated thermal expansion. If you see multiple cracked corners in one area, the roof may be entering a faster wear phase. Document the damage and watch for related attic moisture after rain.
Moment #8: Granules collecting in the gutters
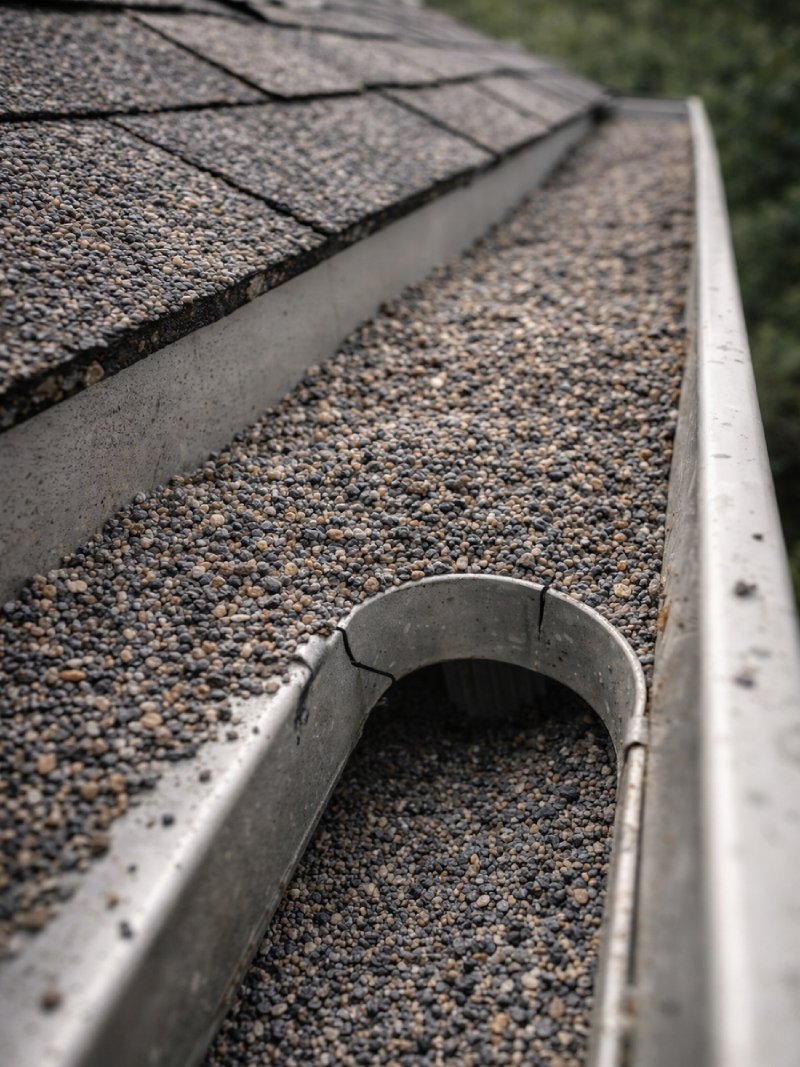
A heavy buildup of shingle granules in the gutters suggests the roof surface is wearing out. Granules protect shingles from UV exposure and help shed water correctly. When they break free in large amounts, shingles can deteriorate faster and become more leak-prone. Check after heavy rain and cleaning cycles—consistent granule loss is a strong clue that roof maintenance or partial repair may be needed.
Moment #9: Rusted flashing along a wall line
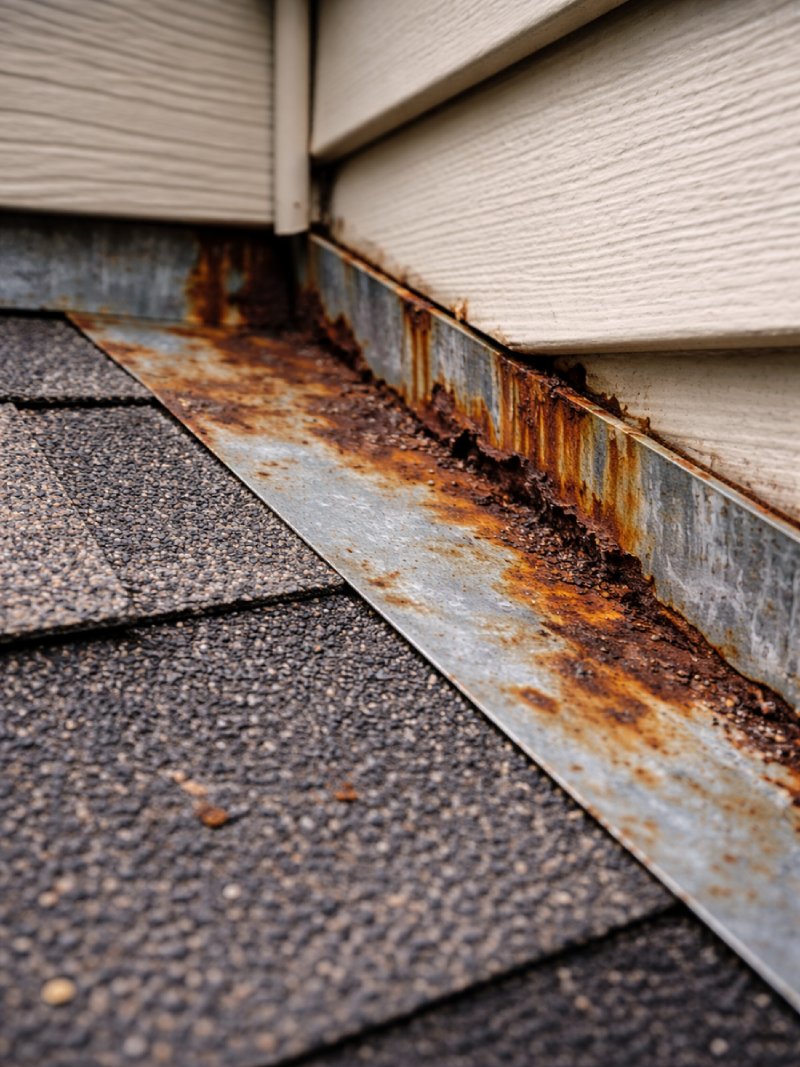
Flashing failures are among the most common leak sources because seams and corners concentrate water flow. Rust, separation, or gaps can let water behind siding and into the roof structure. Even a small opening may route water into insulation and framing. This is often a high-value fix area because correcting flashing usually prevents repeat interior leaks. If you see corrosion, it’s worth inspecting all adjacent seams too.
Moment #10: Chimney flashing gaps and cracked sealant

Chimneys create multiple seams where water can enter—step flashing, counter-flashing, and sealant joints. Lifted edges or cracked sealant can cause “mystery leaks” that appear far from the chimney itself. If leaks occur after heavy rain or wind, this is a prime suspect area. Small flashing repairs can prevent major damage to roof decking and interior drywall near the chimney line.
Moment #11: Cracked roof vent boot
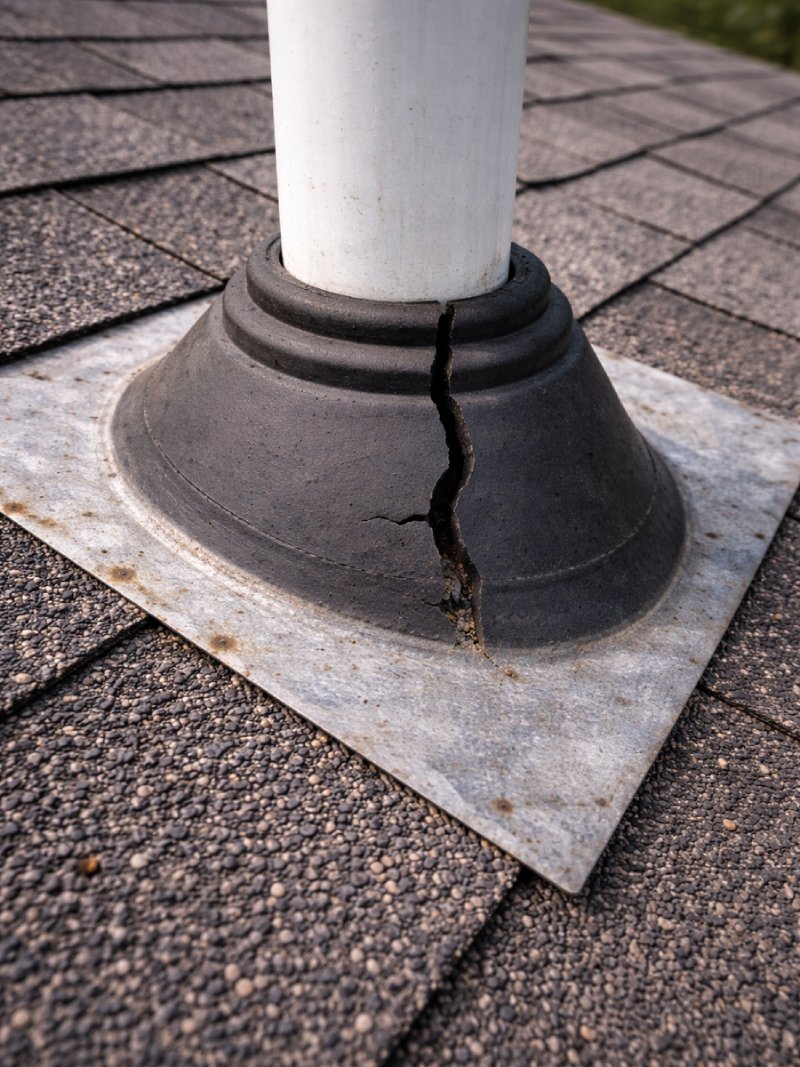
Rubber vent boots crack from sun exposure and temperature swings. Once split, water can drip directly into attic spaces around the pipe penetration. This is one of the most cost-effective leak repairs if caught early, because the failure point is obvious and localized. If you notice dripping around a vent pipe during rain, the vent boot is often the first component to check or replace.
Moment #12: Valley debris buildup forcing water sideways
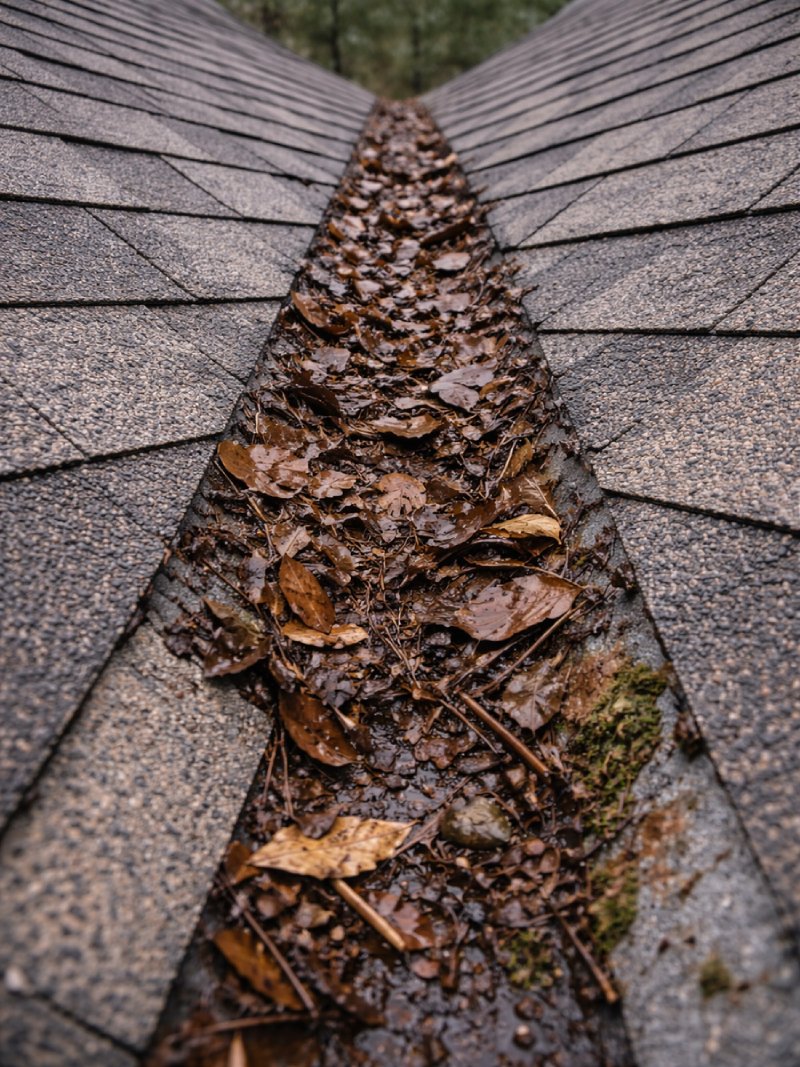
Roof valleys carry a high volume of water, so debris here can trigger fast leaks. Leaves and dirt can create a dam that pushes water under shingle edges and into the underlayment. Even if the roof is otherwise healthy, a clogged valley can cause repeated moisture problems. Clearing debris and checking valley flashing helps reduce leak risk, especially after storms and during fall season.
Moment #13: Ice dam evidence near eaves (winter)
Ice dams can force meltwater under shingles and into the roof deck. Interior staining near exterior walls and eaves is a common clue after freezing weather. Unlike a single broken shingle, this problem is often tied to heat loss, insulation gaps, and poor ventilation. If you see this pattern in winter months, the long-term fix usually involves attic airflow and insulation improvements rather than only patching shingles.
Moment #14: Sagging roof line

A sagging roof line can indicate long-term moisture damage, rot, or weakened decking. This is more than cosmetic—structural strength may be reduced, especially after repeated wetting cycles. If the sag looks new or has increased over time, it deserves professional evaluation. Combine this with attic checks for darkened wood or damp insulation. Addressing structural issues early can prevent much larger repair work later.
Moment #15: Stained fascia and soffit boards
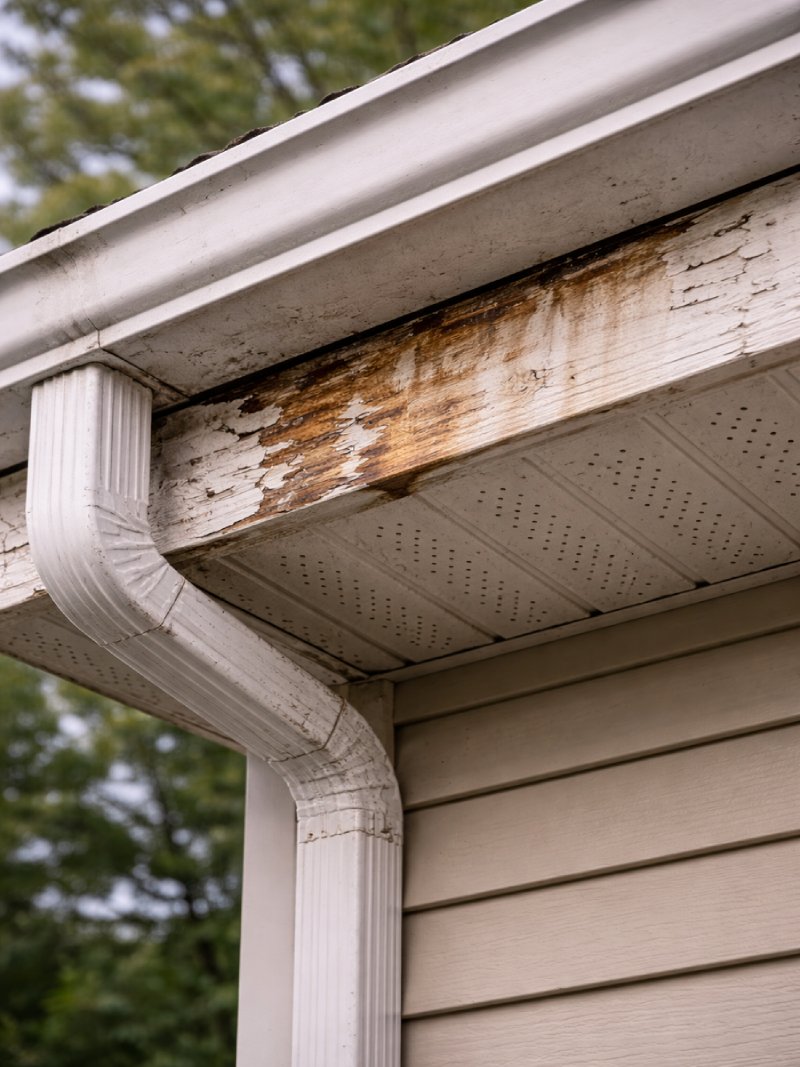
Water doesn’t always enter from the roof surface; it can travel to the perimeter and stain fascia boards. Peeling paint, discoloration, or soft wood around the eaves often points to gutter overflow, drip edge failure, or wind-driven rain intrusion. If left alone, fascia damage can spread into the roof edge structure. This is a common maintenance repair that can prevent future rot and repainting costs.
Moment #16: Moss growth patches on shingles
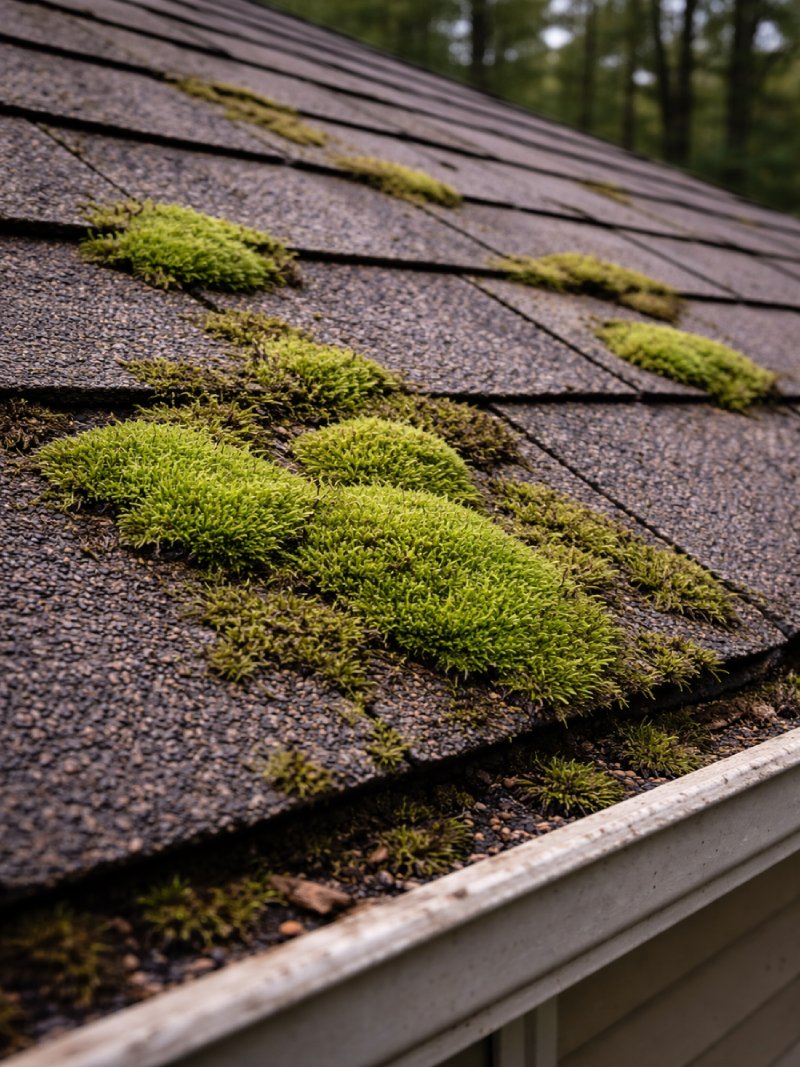
Moss retains moisture and can lift shingle edges over time, reducing the roof’s lifespan. It commonly appears on shaded roof areas and can spread quickly after wet seasons. Beyond the cosmetic look, moss keeps shingles damp longer, increasing the chance of granule loss and cracking. If moss is widespread, cleaning and prevention can help reduce early replacement risk and minimize leak development in affected zones.
Moment #17: Hail impact bruises (granule loss)
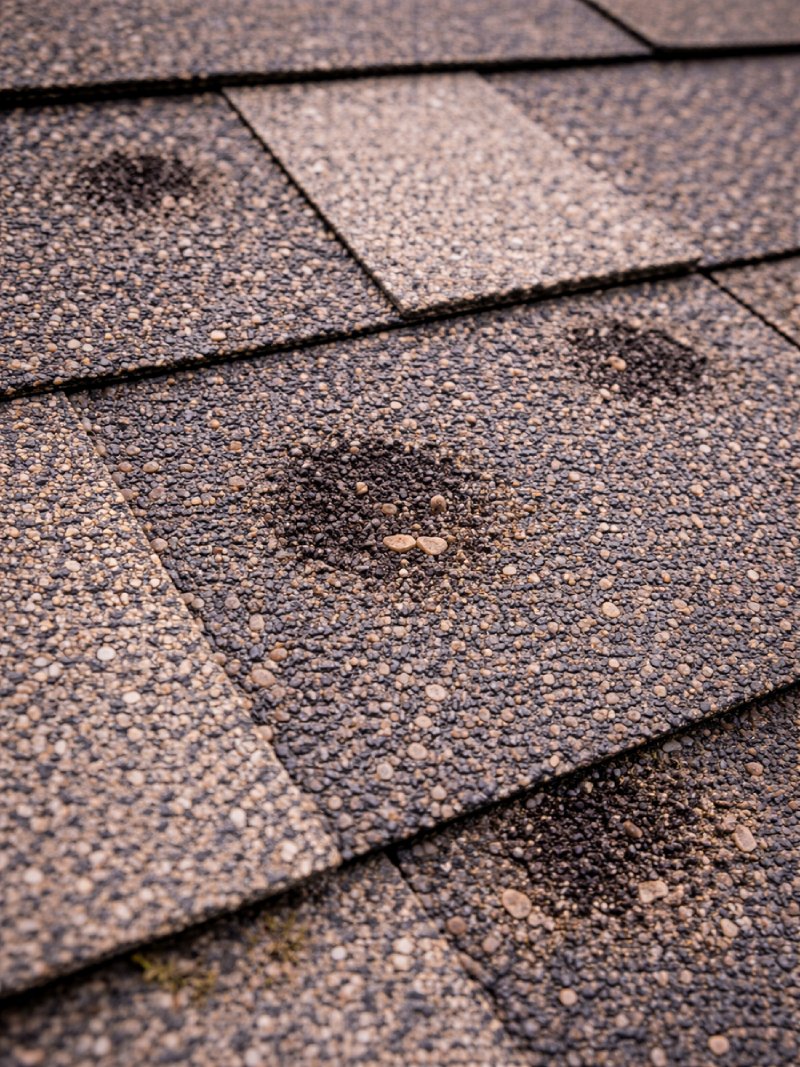
Hail damage often appears as dark bruises, scuffs, or spots with missing granules. Even small impacts can weaken shingles and make them more prone to leaks later. After hail storms, check slopes facing the storm direction and look for consistent damage patterns. If granules are missing and asphalt is exposed, deterioration accelerates. This is a common reason homeowners schedule inspections soon after severe weather.
Moment #18: Active drip from roof decking seam
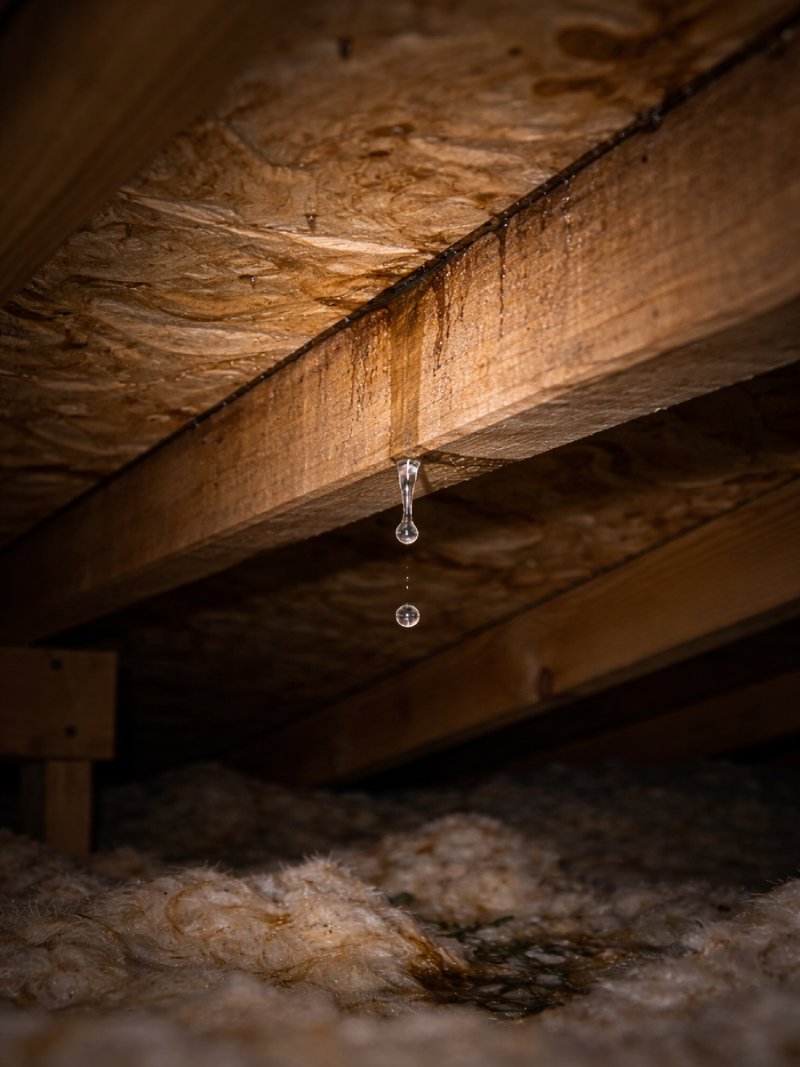
An active drip inside the attic usually means the leak point is nearby. Water can travel along decking seams and fasteners before it finally drops onto insulation or framing. This is typically urgent because moisture can spread quickly and damage large areas. Place a container temporarily, document where the drip starts, and avoid touching wet electrical components. A fast repair often prevents more expensive interior restoration.
Moment #19: Mold spots on roof sheathing
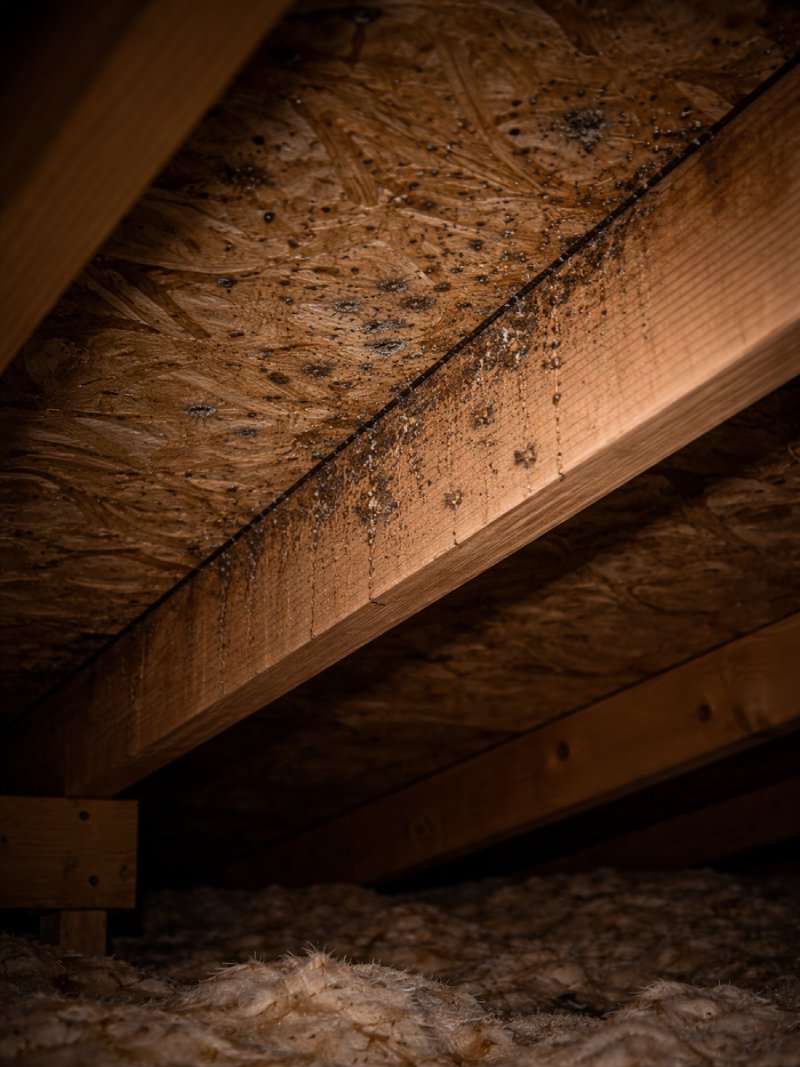
Dark spotting on roof sheathing often indicates persistent moisture or long-term leakage. Mold can spread quietly in attic spaces, especially where ventilation is limited. Even if the leak is small, repeated humidity can accelerate wood deterioration and create remediation costs. If you notice this, pair it with checks for wet insulation and airflow problems. Fixing the moisture source early is typically far more effective than cleaning alone.
Moment #20: Skylight flashing failure
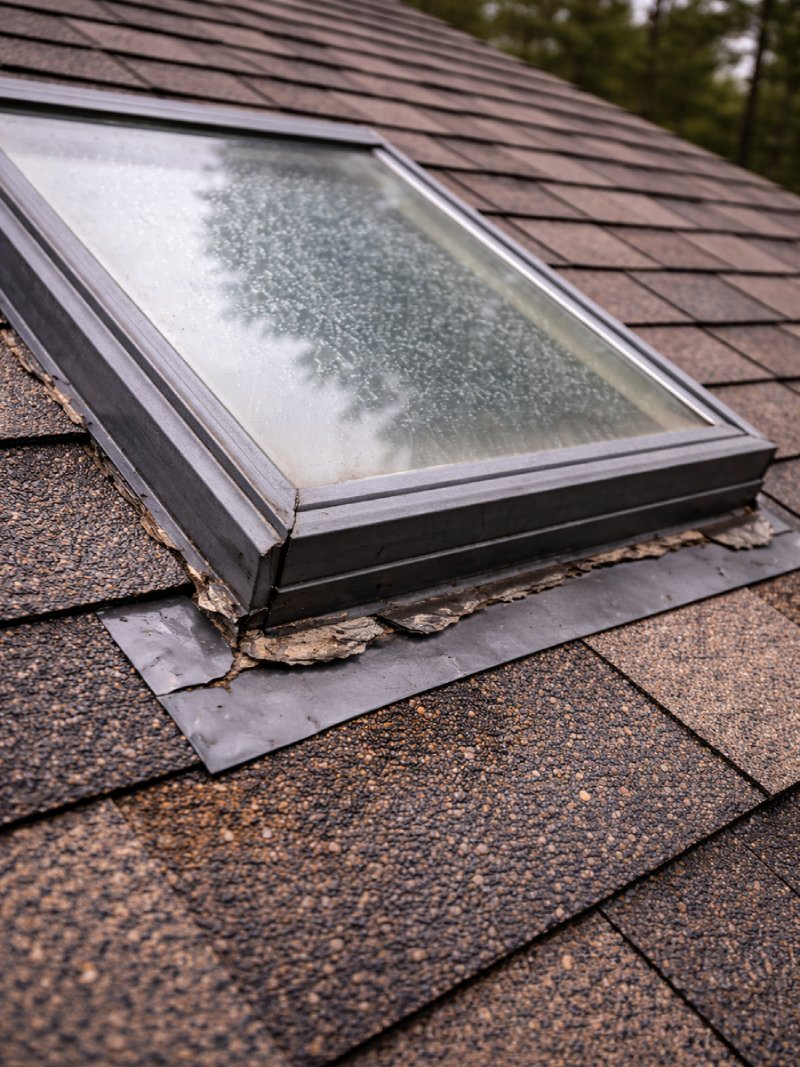
Skylights are common leak points because they create multiple seams around the frame. Worn sealant, lifted flashing, or small gaps can let rainwater in during heavy storms. Leaks may show up as staining below the skylight or damp insulation around the opening. If you see repeated moisture after rain, skylight flashing is often the first area to service. Professional resealing or flashing repair may be required.
Moment #21: Gutter overflow streaks on siding
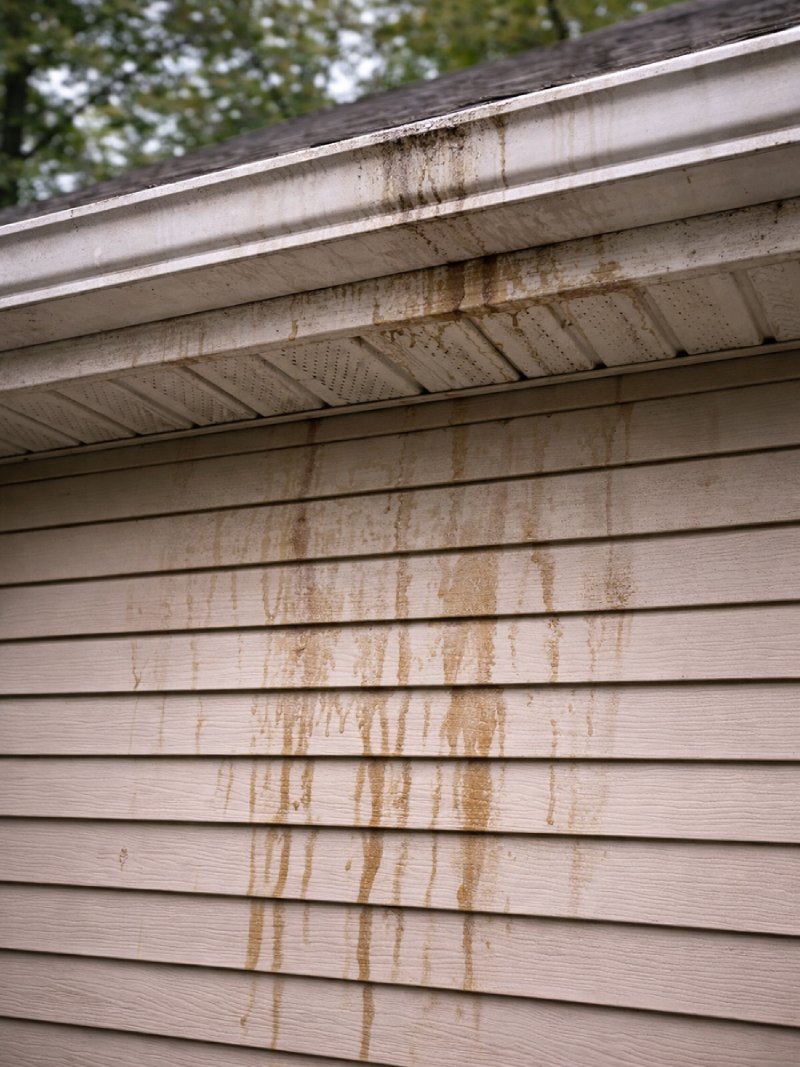
Overflowing gutters can push water under shingles and behind fascia boards. Streaks and staining below the gutter line may appear before any interior damage is obvious. During heavy rain, clogged gutters can cause water to back up onto the roof edge and soak the decking. Cleaning and checking downspouts is an easy first step, but persistent overflow can also indicate slope or capacity issues that need repair.
Moment #22: Damaged drip edge / roof edge metal
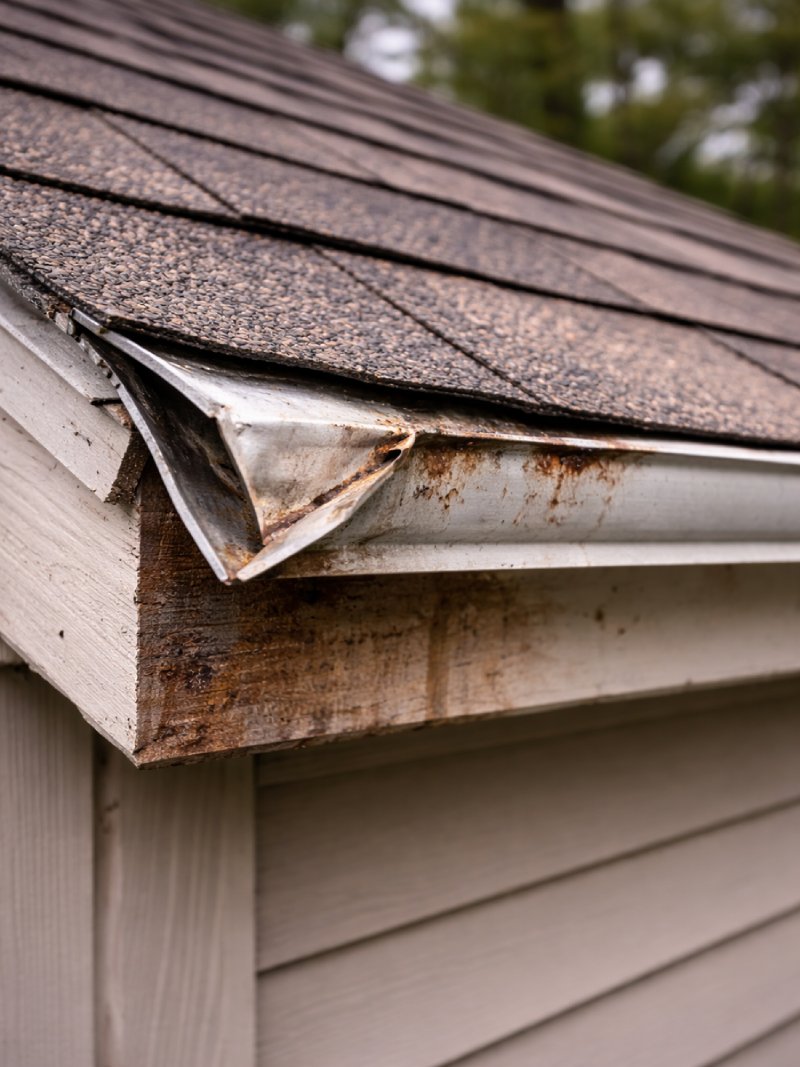
The drip edge helps control water at the roof perimeter. When bent, rusted, or missing, water can wick into the decking and start rot at the edge. This damage often goes unnoticed until fascia boards soften or paint peels. If you see corrosion or gaps along the eaves, it’s worth addressing early. Edge repairs can prevent long-term decking replacement and reduce leak recurrence near gutters.
Moment #23: Exposed nail heads / fasteners on shingles
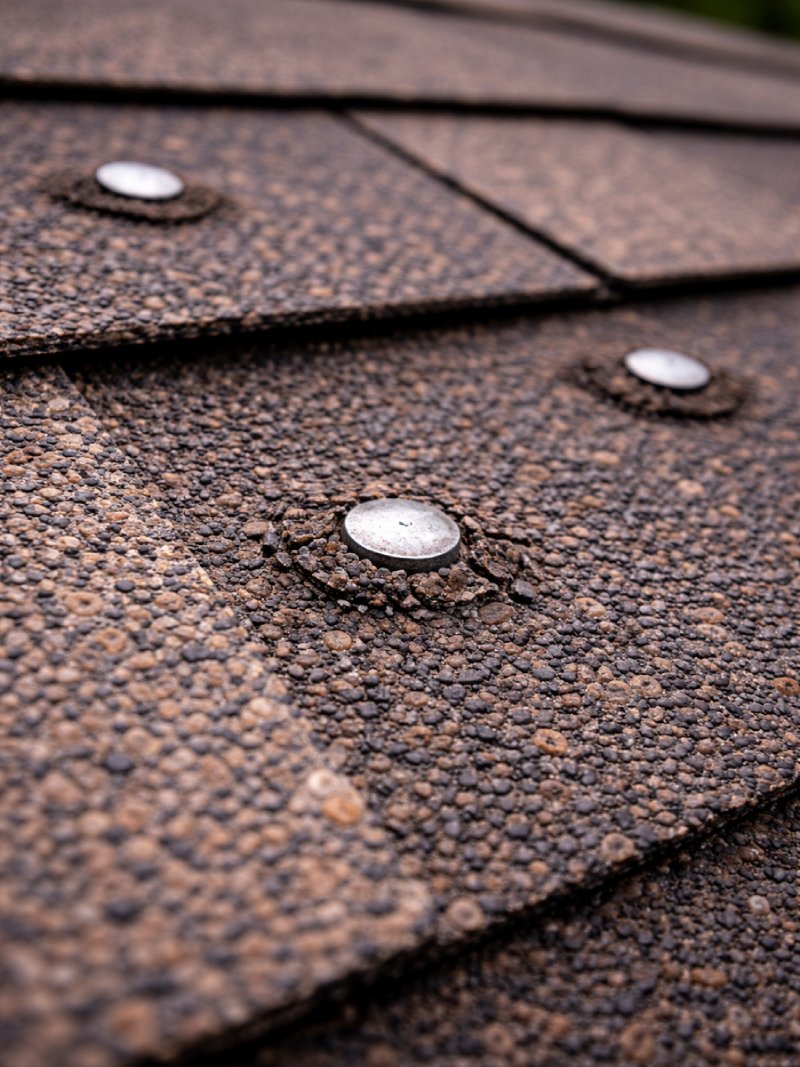
Exposed nail heads can become direct entry points for water. Over time, temperature changes can loosen fasteners and crack sealant around them. Even a tiny opening can route water into underlayment and insulation. If you notice multiple exposed nails in one roof section, it’s a sign of aging installation or wind stress. Sealing and replacing fasteners is a common targeted repair that prevents larger moisture damage.
Moment #24: Loose flashing around a plumbing stack
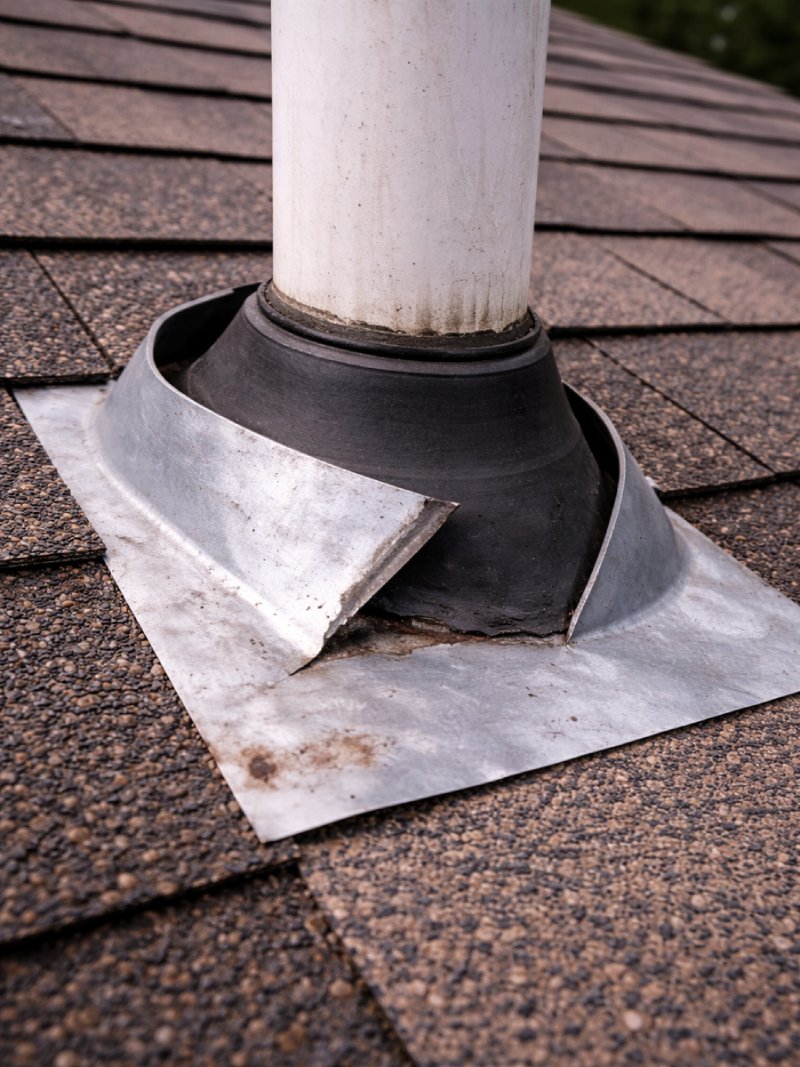
Pipe penetrations need tight flashing to stay watertight. If the flashing is loose or separated, water can enter around the stack and soak insulation below. This issue often causes localized attic moisture that appears after wind-driven rain. If you see staining near a vent pipe, inspect the flashing and surrounding shingles. Fixes here are typically straightforward and can eliminate recurring leaks quickly when caught early.
Moment #25: Rotten wood near eaves (advanced damage)
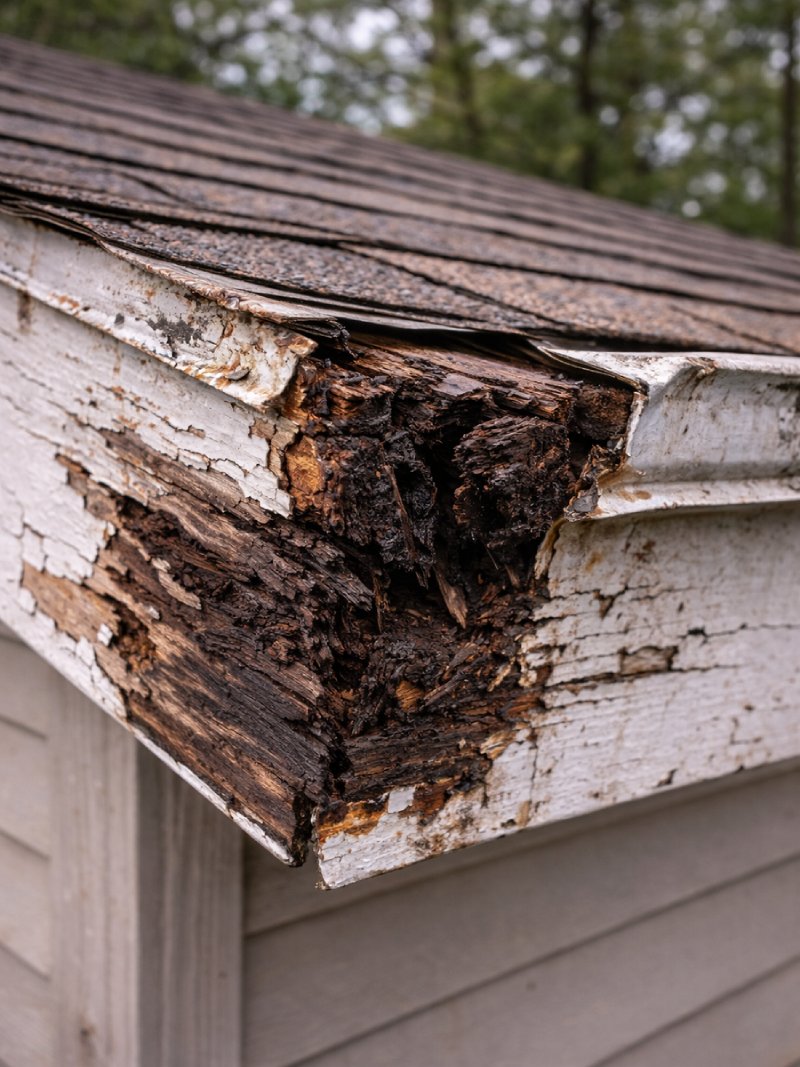
Soft, darkened wood near eaves often means long-term water exposure and rot. At this stage, repairs may involve replacing fascia, decking sections, and correcting gutter or drip-edge issues. If the wood crumbles easily, structural integrity may be affected. Document the damage and avoid applying quick cosmetic patches. A contractor can assess the scope and help prevent the problem from spreading to adjacent roof sections.